 euda
dot-jp
euda
dot-jp
Special web site forcusing on FreeBSD server, Linux desktop, and miscellaneous issue.
Special web site forcusing on FreeBSD server, Linux desktop, and miscellaneous issue.
Unless you use brand-new hard disk drive, and if there are certain important data in hard disk drive, you should certainly backup them before installation.
First, you should construct PC only for FreeBSD, not dual boot. For this purpose, initializing hard disk drive is indispensable. Initializing means not formatting but erasing whole area including partition physically. I use Acronis PartitionExpart (outside Japanese, it is no longer available). This soft is very functionally. However, in some recent PC, it doesn't work well.
During hard drive become whole empty, fetch FreeBSD iso image. Sites holding FreeBSD iso image are listed here. In the case of release 7.0, the file needed is only 7.0-RELEASE-i386-disc1.iso on /pub/FreeBSD/ISO-IMAGES-i386/7.0/ (you use i386 base PC, right?) directory. Download this file and save it.
Next step is to burn iso file to CD-ROM. Here, do not burn file as data, burn as image. In the case of B's Recorder (Japanese edition), drag and drop to lower-left pane, not lower-right pane. Some softwares is related to .iso extension. By these software, you should only double-click the .iso file.
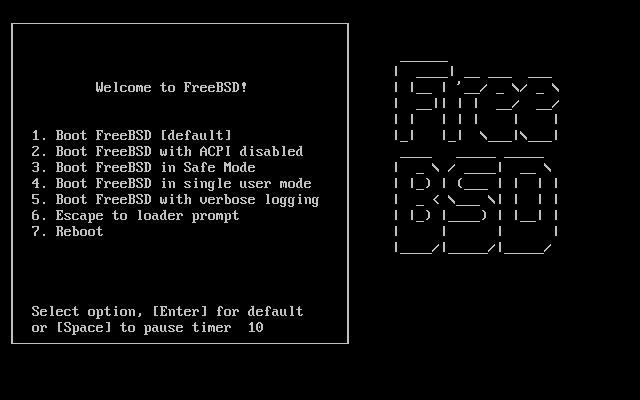
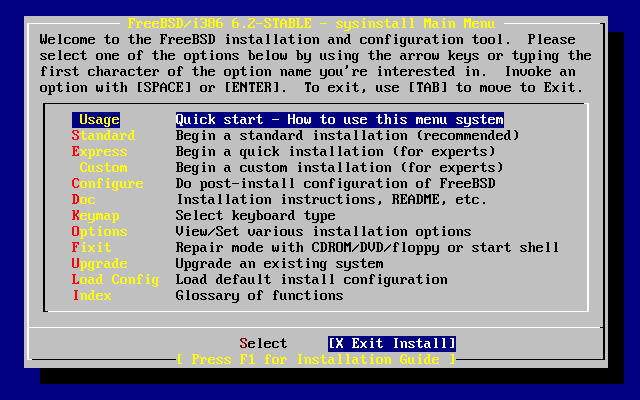
That is the all materials needed. Reconfirm the PC mounting a entirely empty hard disk drive and FreeBSD installation CD-ROM. After reconfirmation, insert CD to CD-ROM drive and boot PC. In the boot process, a plenty of messages appear. If booting stops with a few messages, there is possibility that BIOS configuration is not correct. Read PC's manual or mainboard's manual to correct BIOS configuration including enable to boot from CD-ROM drive. If FreeBSD's logo of ASCII art appears, initial boot process successfully terminated (its screen capture is put somewhere in this page). Hitting enter key or leaving a few seconds, booting process again proceeds with plenty of messages again. This process detects devices on the PC. After a while, a screen entitled "System Main Menu" appears. From here, substantial installation process starts. There are various way to install. However I prefer "Custom install" because this method is most intuitive, and because you have only to configure services you need after installation.
After select "Custom install," 6 selections appear. Entitle "2 option" configure install option. For the purpose of ordinary use, it is not necessary. Do not alter here and leave empty unless you have special intension.
Selection “3” configures partitions of hard disk drive. In the FreeBSD, “partition” means slightly different from in Windows and from in Linux. As mentioned in the beginning, in this site, the disk drive is whole used by FreeBSD. To set such configuration, enter to this selection and press “a” (all) key then “q” (quit) key. Subsequently, boot manager selection screen appears. Here, system is only for FreeBSD. Thus, select “standard”.
Selection “4” is label configuration. This means likely partition of Windows and Linux. To construct flexible system, it is better to consider carefully to allocate amount of root to some MB, /usr to some GB, and so on. However, I have never used this function. I always use auto-allocation. When free space of hard disk drive decreased seriously, I bought a larger drive and re-mounted it. If you need to configure labels in detail, read other documents. Anyway, to configure labels automatically, enter this option and press “a” (auto) key then “q” (quit) key.
Next configuration is “5”: distributions. This specifies how configures base software, documentations, and other stuff. I select this function “all.” Although you select option “all”, Apache and other server program is not installed (they are included in “ports”). They should be installed separately. Thus, to enable to see documentations, I think it is best way to select “all.” One annoyance in selecting this option, this installs basic X.org program.
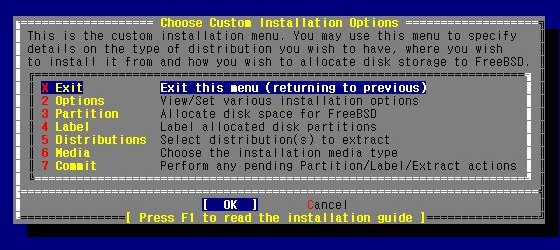
Option“6” — selecting installing media. There are various options in this selection from local CD/DVD drive to network install. In this case, you should select local CD-ROM drive installation unless this selection causes any difficulties.
So far, you can reconfigure every install option: install process does not affect anything to your hard disk drive. Thus, you can reconfigure label setting or you can select distribution again now. However, by entering option “7” — commit, all installation configurations are fixed and main installation starts: the hard disk drive is divided appropriately and requisite files are transferred. To return back to previous step is so difficult though it is not definitely impossible.
After some time, file translation is terminated and screen entitled “User confirmation requested” appears. I do not know what happens if I select “No.” However there is necessity to configure option here. Thus select “Yes” now.
First, setting root password. Set password as you like, but never forget it.
Next, at “User management” option, create at least one your working user because logging in as root user is not recommended (if you login as root, warning message appears) in the sense of security. The way to get root authority is described later. To create user, select “User: add new user.” Almost all setting would be arbitrary, except “group.” Group should be set to be “wheel,” in concerned with root authority mentioned above. Setting “Shell” can be leaved default, however, I prefer C-shell (/bin/tcsh).
(For non-English user only) To set keyboard layout correctly, select “console” — “keymap.” I think recent FreeBSD release primarily asks keyboard layout. Thus it may be dispensable. However, I set this option to make sure. For example, Japanese user may select “Japanese 106.”
Also, “Time Zone” should be set. The program asks you whether you use Greenwich mean time or not. Thus almost all users should be change this option to local time by answering “No.” For Japanese, select “Asia” — “Japan.”
Configuring “Mouse” makes operations slightly smooth, but is not important. For almost all mice (particularly PS/2 mice), select “enable” option. If it doesn't work, configure connecting option or read other documents. To emulate Unix 3 buttons mouse, select “option” and input -3 option.
Finally, most important configuration of “Network.” First set network interface card to work. The option of network interface card configuration appears uppermost in “Network” selection. It is represented abbreviations of three letter of alphabet and one digit number. It differs from card to card. Subsequently, another monotone screen appears. Running PC by DHCP is not recommended for experimental (and other) server use. The option of “Host name” can be set as you like. “Domain name” is, because in this site, PC is located inside LAN, not necessary, but enter some name like “localdomain.” In “Gateway”, ordinarily enter router's address. Most of router's IP address is like 192.168.1.1 or 192.168.0.1. IP address of “Name server” should be IP address of given DNS server address from your internet service provider (maybe you're announced). In my environment, the router plays roles of name server. “IP address” should be the address not used. It is easy to operate using good IP address to leave off like 192.168.1.200. The option “Netmask” may be 255.255.255.0 in the environment above mentioned (if you use router for home use, the number is definitely this number). Moreover, back to “Network” configuration main menu, check SSH option on (lowermost part). This allows you to login from remote PC using SSH client (extremely recommended).
That's the all configuration needed. Keeping select <exit>.. <exit>.. until top level, option “Exit install” appears. By selecting this option, installation process terminates and system reboots. You may see a plenty of booting message. If the message “login:” is displayed, the whole installation is successful.
